Monday, December 26, 2011

Thanks Bessey for The 12 Days of Christmas


I don't  often about companies unless it's a product that I use in my work or have used in my years on the job a trust and I'm doing a review, to many tool companies try to lure us to add their tools to our tool boxes and workflow with fancy adds or gimmick like big give always or big flashy adds. This Christmas Bessey did something on Facebook that I thought was a very nice jester to their customers, they did their 12 Days of Christmas, where each day they ask a question on their Facebook page and if you commented on their post you received a small give of one of the clamps or one of their metal cutting snips. Now some might say its a gimmick, Ok maybe it is, but I think it is a great way to honor and give back to their customers besides being a great way to introduce themselves and products to new customers like I have been using Bessey clamps for years, but I didn't know they sold metal working tools. 
I have many clamps, its what happens when one works wood for thirty years but as the saying goes "you can never have enough clamps" and the same goes for me. Over the years I have have change not only the project I build but the style I build them now. I build more instruments now, I do more carving, and I use more hand tools in my work flow, all making me be as creative with my clamping as I am with my project and Bessey has already thought of most of these solutions for me, thank you Bessey. 
More than any thing else I just wanted to say Thanks to Bessey in a time where we hear a lot about corporate greed it's nice to see a company giving back to the people that buy their products. I know it will a factor in my future clamp purchases, if Bessey have what I need even if it is a little more $ I will more than likely go with the Bessey clamps. So again Thank You Bessey and Merry Christmas and Happy Holidays and I hope you have a most prospers New Year.
Sleepdog Woodworks    

Friday, October 28, 2011

How I Wood Do It "The 1/2 Lap Joint"

This is the first of a monthly feature we are calling "How I Wood Do It" each month a few of us bloggers will be posting how we would do a different technique in our shops. Hopefully this will give you, our readers a different point of reference on a simple techniques. Well lets get to it shall we. 


The Half Lap Joint


The half lap? Really how often is the wood joint really used in every day woodworking?  It is a strong basic joint, that is fairly fast and easy to make, and is one of the first most people learn in classes.

It is used in everyday woodworking! Well, I worked in a shop in the 80s that build pine face framed cabinet and the owner swore by half lap joint to assemble the face frames, so I learn to cut them quickly and accurate, we had many heated debates in the shop over this joint compared to using the mortise and tenon as well as some other joints for the same application. We really wasn't set up to to cut mortises in the shop and didn't want to invest in any more tooling and we could do the half lap quickly with the tools we had. Since then I have used this Half Lap Joint for a lot of projects since it is a strong easy joint.

This is how I cut the Half Lap Joint.

If I have to cut a lot half laps, I like to do it on a table saw either using a single, or a dado blade. I like the table saw better, because if you screw up and the wood happens to lift up off the table top the blade cuts into the waste material and can't cut into the material that is the joint and you won't ruin the cut by cutting into it. If you did this on a sliding miter saw or radial arm saw and the wood lifted up it would cut though the waste and into the joint itself. 

If I just have a single joint or two to cut, I use a making gauge and a hand saw to cut out the waste and clean and fit the joint with a shoulder plane. Some times if I have more than a couple or if I am in a hurry I will use my band saw to replace the hand saw part of the operation, but the rest is the same.
  • I first make sure the sides and face are planed flat and square and put a X on my reference face and edge.
  • Then I  find center with my marking gauge.
Setting the marking gage for center
  •  I do this by marking a dot from each side then by trusting my eye to judge center I readjusting my gauge to the center then checking it from each side again and repeating again if needed, the more you practice this the better you will get at doing it in just a couple of try's. 
Checking the right side


Checking from the left side
  • I then mark three lines on both boards, one on each side and the end the board, and then square a line the width of my boards from the end. marking from my references face which I always layout from I also mark the waste on my reference side.
The waste marked with an X

Both sides laid out
  • I saw down the waste side of the line, and then crosscut across following my squared lines until the piece falls out
Starting the rip


Following the line down to the crosscut

Following the line

Defining the line

Finishing the cut
  • I then use a shoulder plane to clean up and adjust the lap joint till it fits.
Adjusting with a plane

Easier to plane when they are clamped side by side
  • My power tools solution since is to use my band saw. again I make sure the sides are planed straight and all the layout is the same as using a handsaw
Crosscutting on the bandsaw

Ripping on the bandsaw

Ripping the the 2nd lap on the bandsaw
  •  I carefully cut the crosscut till I get down to my layout line then I rip it on the waste side till the scrape falls out then I clean and fit it with a shoulder plane. if I had more than a few to do I would set up a fence for this part with the waste side toward the fence.
Checking the fit

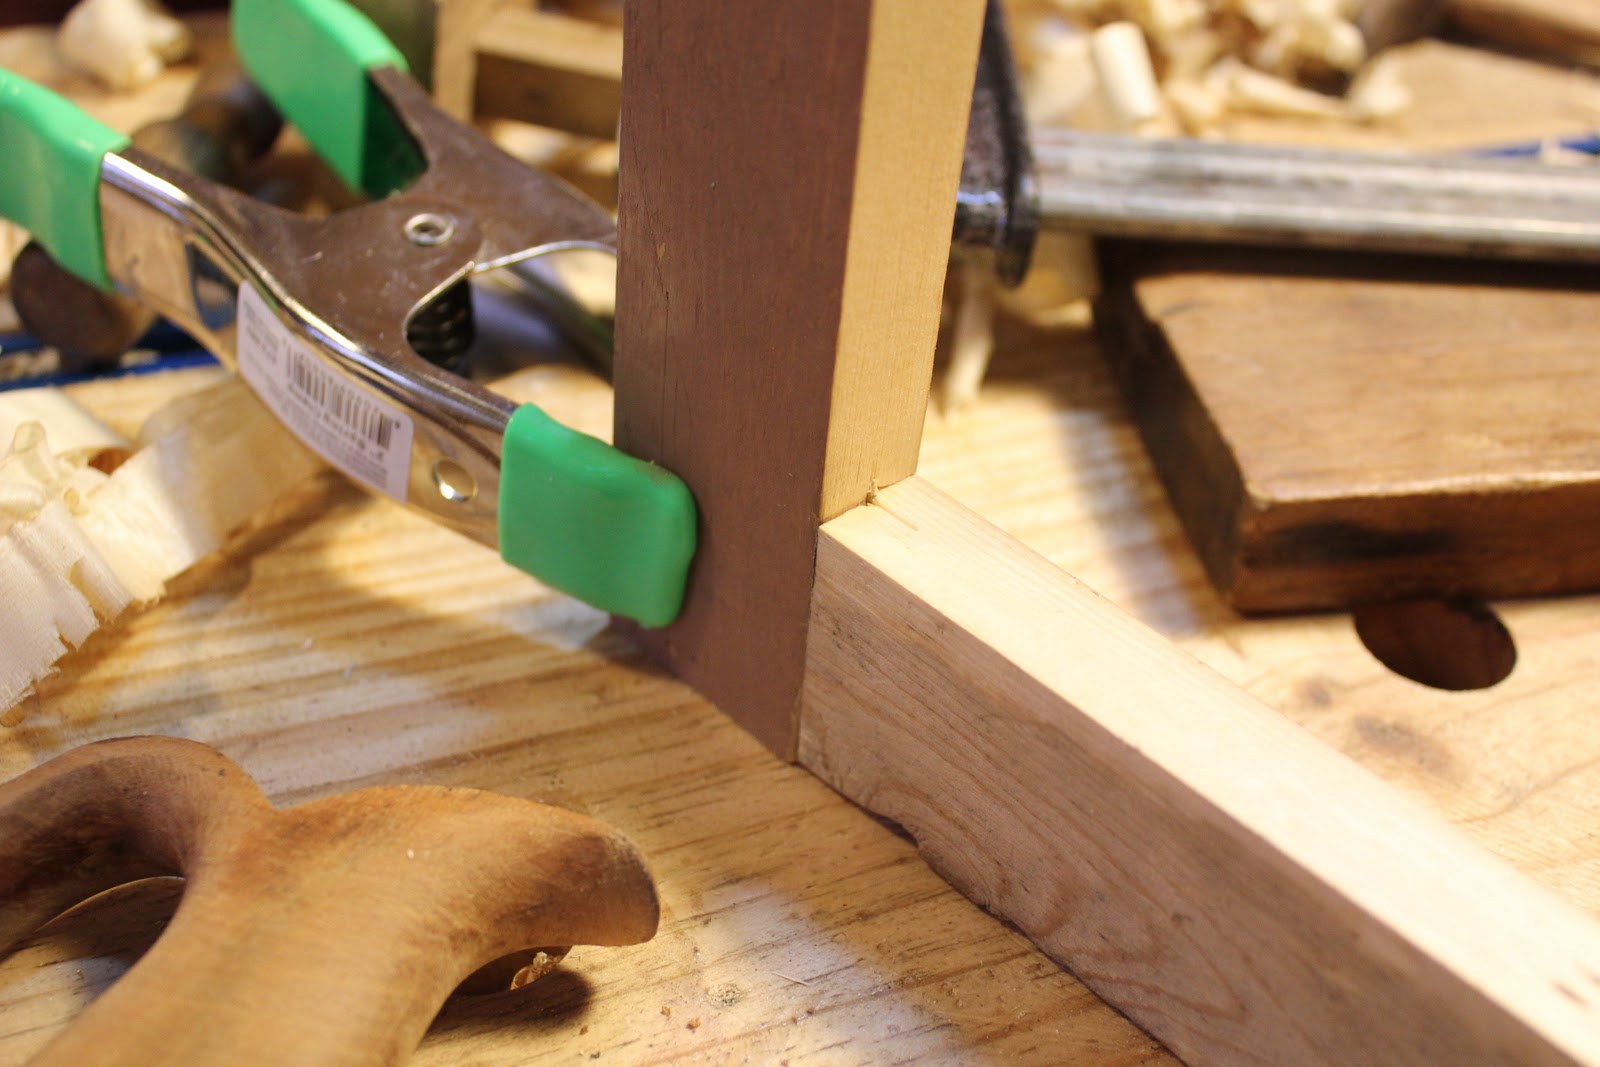
Clamped together @ 90 degrees


Another view
Next Month we will be doing "Mortises" 

Below are some of the other Blogger and Podcaster that will be joining in this monthly feature next month will be the official start and not ever person on this list will be able to participate each month, but hopefully enough will that we will get a wide variety of experience and insights that we will all learn something. As other bloggers join in I will add links to their sites so you can just post though to them right and each bloggers will do the same making it easy to find all the postings. If you are a blogger or a podcaster and you would like to participate let me and I will give you the details.


Oldwolf Workshop Studio
Sandal-woodsblog
Tomsworkbench
Sawdustislife
Thewoodninja
Penultimatewoodshop
Scottmorton
Flairwoodworks
Ravinheart
Americancraftsmanworkshop

Monday, October 10, 2011

My First Woodworking In America

This year was my first Woodworking In America, and I thought I would share a few thoughts with everyone. I went as a volunteer this year to run a camera for Ron Herman's first two sessions classes, which worked out good for me because that as two of the classes I wanted to attend. The classes was combination planes and shooting boards. both subject Ron is very knowledgeable in. I had some technical problems like when I first got in the class room there was no camera and when I went out to see if I could find out where I could get one someone just drop a camera off back in the class without even giving me a few minutes of instruction in the operation of the camera or telling me if they wanted me to record the class. so I got everything working and faked it until I made it, all the while trying my best to to stay out of Ron's way and using the camera when it was needed. I wish there would of been more chance for hands on, but I can see where the amount of people who attend and time we had how it would be a problem.

The classes where interesting and informative, but they where short and kind of like a condense lecture that went over mostly material that we have gotten from the magazines over the years. Now I am not saying they wasn't interesting and they there wasn't nothing to learn, because that not true it's just there was small nuggets of information about lots of different things to learn there. If you where going to just learn something like say, how to improve cutting dovetails while you might get some great tips I think you would come away disappointed overall and would better off spending your money on a class at Chuck Benders school. Now if you when there wanting expand your ideas about woodworking in general, and meet some great guys, see wonderful tools and have just a fun filled weekend talking, eating, and drinking woodworking, then you surly won't be disappointed as I wasn't.


Like I said the classes where interesting and informative, but the market place was where all the action was. there where some wonderful tools that honestly as a tradesman I could never afford to own, but they where fun to play with. The toolmaker where great to talk and are a wealth of information. There was a mix of power tools and hand tools I even saw some air nailers and the neatest air brush by Grex. Getting a chance to talk to guys like Chris Wong who makes top escapement hollow and round planes, and Shannon at the Hand Tool School, and of course the guys at Lee Valley was a treat for me and my wife.

The hand tool Olympics had to be funniest spot on the floor, the guys and girls that works that event not only are friendly and helpful they have a great sense of humor. I really have to say I haven laugh as much that weekend as I did standing around ribbing the other bloggers as they cut their dovetails. I even stepped up and cut the first hand cut dovetail I have cut in twenty five years, and to be honest I have been rethinking using my router and start cutting them by hand. maybe? but the point is if I wouldn't of tried them there I would even be considering it now.

The best thing about Woodworking In America  for me was the people. This was the first time I have had a chance to meet most of the bloggers that I talk to on google, twitter or face-book and read their blog's everday.  I had a chance to meet and talk face to face with these guy, to laugh and drink with them, and now I feel like I made some friends that will last a life time even if I never see them again in person.

Will I go back? well I all ready started a coin jar and I'm saving for WIA12, and even if I don't get to go back as a volunteer I will find a way to get there somehow.

Thursday, September 22, 2011

My Journey to Becoming a Woodworker


I started on my adventure as a woodworker early in my life, my first project was converting a basement coal bin into a bar for my mom. I collected pop bottles to buy a Black & Decker jig saw and drill them an old key hole saw and a hammer were my whole kit, I was eleven and I was hooked. I would stay up late at night reading popular mechanic and dreaming of the day that I could own my own shop smith, hey I was eleven. 

At fourteen I got a summer job hanging drywall for $2 an hour and by the end of the summer I was also doing some taping which I had a knack for. I did that for two summer and after school and weekends. 

High school came and I got into the carpenter Vocational program and work experience program which let me go to school in the morning until 11:00 am then go to work the rest of the day. The summer before I started with an older semi retired carpenter who was the father of one of the guys I was drying for. 

I was lucky in many way to get that job even at the time I didn’t know it. The old carpenter that I started working for was semi retired and in his 70s, his father was a jointer and a carpenter, and his grandfather was also a craver and a cabinetmaker who came from Europe to Cincinnati in the 1880s to work as a carver. He was a tough and demanding employer who was a wealth of knowledge that influenced me more then I would have admitted at the time. 

I was one of three that he hired that summer and the only one that lasted for the all summer. I knew to keep my mouth closed and my eyes open and only ask questions when I didn’t understand something. For few months I wasn’t allowed to touch a power tool, I had to use a hand saw to make any cuts I had to make and he made me cut quite a bit more than you would expect. He showed me how to sharpen that saw only once and every friday I had to sharpen it and after he thought I got fair at sharpening saws I had to sharpen all the saws that needed it plus the chisels and planes, let me tell I hated it! 

I wanted to be a carpenter, but I gave my word I would work for at lease two years for him and I was going to keep my word. After about eight mouths of grunt work he started letting me start doing other type of work and it all started out of the blue one afternoon when he asked to build a set of stairs I was flabbergasted this was the first time he has asked to build any thing and it was a set stairs, now they were not a particular hard set only 4 rises going from a garage to the kitchen. I knew I could do this I had helped him make several set and watched carefully plus I did well on this section at school, so I got all the lumber I need and an hour later I had them done and called him over to see if they passed mustard which they did and it  was the beginning of more serous training. I asked him later why he had me start with a set of stairs and not something easier and his reply was that by this time in you're training if you couldn’t build them steps you were  just be wasting my time to try to teach you anything else and you would been better off finding something else to learn to do for a living. He told me that day that a lot of people can build, but not every one can be a true craftsman it is something that gets into your blood and becomes part of your life a carpenter or cabinetmaker isn’t just what you do for a living it is who you are. Its how you see and interact with the world, and to this day no truer words have ever been said to me. I worked for him for a year and ten months until I enlisted in the Army He passed while I was in the army and I think of often he was the foundation of my career and I couldn’t had a more solid well rounded education even if I couldn’t have known it at the time. 


Wednesday, September 7, 2011

Kreg Jig Review


Recently I had the opportunity to use a Kregs Deck Jig on a small deck. I want to start off by explaining that I have build more than a few decks in my career as a carpenter most as a sub contractor from builders and a few that I contracted myself. I have always been less than happy with a surfaced nailed deck but finding a blind screw system that the builders would use was always a challenge, so except for the decks I build for myself I always ended up either surface nailing them with a nailer or screwing them down with deck screws. Both of these methods presents their drawbacks as well as strengths when using treated lumber. composite decking always needs to be screwed or blinded screwed with a system that is designed for the purpose of holding that type of decking. Most composite decking also has a slot milled in it that is designed for a system for blind screwing they're decking down and a screw they recommend. Kreg Jig has come up with a jig that will work universally with composite deck boards, Also works great with native softwoods such as Redwood and Cedar, along with certain Tropical Hardwoods like Ipe, Red Balau, and Ironwood. Works exclusively with 4/4 to 5/4 (3/4″ to 1-1/8″) stock , as well as treated decking; however, a lot of people don’t recommended using it for the treated lumber because of the amount of wood movement, and it was not designed for use with 2x material including 2×4′s, 2x6’s, 2x8’s, at all.

The kit comes with the jig, two sets of three spacers each ¼” and 5/16”, a drill bit, a driver bit, two stop collars, an allen head wrench, and a sample pack of screws.

before using the jig you will need to install the three drilling guides to the jig body, and the small rubber non skid pads.  Then install and adjust the stop collars on both the driver and the drill bit.

The jig has three drill guides each with a steel insert.  One of the guides is angled left, one right, and one at a 90 degree angle. The center guide, the 90 degree one is the one normally used.  Each of the angled guides are used either if you run up against an obstruction to the left or right, or if you need to secure a joint over a joist.  The jig is handheld this is a deviation from all the other Kreg jigs 

One thing different from other Kreg jigs in that it is designed to be used to insert the screws.  The screws are proprietary and have been sized to fit same hole as the guides that the drill uses.  This results in an extremely small head size.  Once you drill the hole for the screw, you switch to the driver insert the screw and drive it to the correct angle and depth.  

“Kreg Deck Screws were designed specifically for use with the Kreg Deck Jig™, although they can also be used as simple face-screws for a variety of outdoor projects. All Kreg Deck screws feature a KTX #1 Square Drive to reduce cam-out, a flat-bottom head which resists splitting, and a self-tapping tip which drills its own hole as it’s driven.
Deck Screws are available in two weather resistant finishes; Protec-Kote™ and Stainless. Protec-Kote™ screws feature three anti-corrosion layers which protect against rusting in a wide variety of decking applications. A good choice for a wide variety of decking applications, including ACQ treated lumber. For even more protection, choose Stainless. Kreg Stainless screws provide the best protection against corrosion in the long-term”

I used Kreg Deck Jig™ on a 12’ x 10’ deck that was decked with 5/4” x 6” ACQ treated lumber, and here is my thoughts, at first it felt a very slow compared to using a air nailer, but like everything new it takes a minute to figure out the best way to work with it. One of the problems I had almost right out of the box was the stop collar on the diver keep coming lose, now I was using a impact driver and I don’t know if that was the cause of problem, however after a few tightening the set screw broke so I stop using the jig to drive the screws and just drove the screw free hand, with my helper standing on the deck board, this did speed things up considerably and after a few screws it was easy to get a feel of were to stop the screw. 

I used the ¼” spacers that comes with the kit for the deck spacing. The wood was still on the wet side, this was the smallest spacer the kit comes with, I always try to get and install the decking on the same day so it is not setting around in the sun drying and warping. After two weeks I measured the gap and the dried down to 3/8” which didn’t surprise me in the 98 degree heat we have been having. I checked closely for any splitting or lifting expecting to have to run some screws through the surface to tighten things down, but after a close inspection I couldn’t find none. I will inspect the deck again in a few months when the weather changes again. All in all I give the jig a C+, will I use it again? Yes, but not if I was building decks for a living again. For the price of this jig, I do wish it had some other use’s besides just decks.  

Tuesday, April 19, 2011

Theres Gold in Them Hills

Gold! if you love wood as much as these guys who own and use these band-mill saw mills do it might as well be gold. As a woodworker it is more precious than gold, I mean what lumber store can a woodworker walk in to and get a piece of stag-horn sumac, yes thats what I said stag-horn sumac, or redbud, gold brother, pure gold.
I first met Randy at a guild show where he was selling frames that he makes from some of the wood that he saws, he picks out some of the best looking cuts and then makes them into a frame and places a picture of the tree from the specie of wood that frame is made of. It is a very nice piece of art both wood and photograph. After talking his frames for a couple of moments and he started telling me about his saw mill which got my attention, because like all woodworker I am always looking for a good source of wood and from Randy's frames I could see he would be a great source for lumber. He said he cuts a lot of quarter sawn and burls which is two things I am always looking for. I ask Randy were he gets is logs and he told me that he manages his own small forest on his farm where he cuts logs, plus he will harvest logs from neighbors farms, firewood, and what loggers leave behind after they cut a stand of timber. He said some of his best and prettiest wood comes from what the logging companies leave on the ground to rot. The logging companies are looking for the straightest highest graded lumber they can get and anything with a deformity, twist, or big burls get left my most logging companies and he can get them at a nominal price or some time even free.

 Later I attended a class he gave on saw mills, where he explained how he saws for the best results, he showed how he loads logs on the mill and set them up cutting the different cut like: flat sawn, riff sawn, and quarter sawn. how to calculate board feet in a log, and he touched on drying and sticking his lumber, but said that was really another class. One of the best things about the class is I got to meet a couple more local owners of saw mills and one is not far from my house, and he has a solar kiln.

Lately I have gotten interested in making stringed instruments and I have found in that community that there is a need for high quality wood, so I am thinking about selling wood for instruments and have talked to the one mill owner about doing some special sawing for me, then I plan on doing the drying and milling of parts and then offering the wood and parts for sale online. I know I won't get rich doing it but hey in these times you have to think outside the box.

Monday, March 28, 2011

Carving Mallet on the Cheap


I have been doing a lot of carving this winter, and not a lot of writing, sorry about that to five people that read my blog. I did however discover that sometimes while I am caving I need something to use to get a little more forceful with my chisels than just my palms. I tried using a hammer, I tried the face and the side, while this worked it wasn't idea for what I was doing.

I have a large wooden mallet and it is great when I am working with my flat chisels, but there again it is to big for fine carving and didn't give me the control I needed, plus I found that I had to spend more time watching the mallet rather than my chisel so I didn't whack myself in the hand. My hands have taken enough abuse in thirty years of working as a carpenter and cabinetmaker so I didn't really think they needed any more at this point.

The answer to my problem was one of those nice little brass mallets you see in all the catalogs, except they cost way more than I really had to spend. the cheapest one I seen being like $69 dollars and if I was going to drop that kind of money it was going to be on something with a edge, really I could buy two nice gouges for that.
Well one day last week I was out at the Goodwill with my wife shopping and I saw a little wooden handle that went to and mortal and pedestal and it was 50 cents and it looked just like the handle on the brass mallet I was saw in the catalog, so I put in the cart figuring I would go and try to find some brass and make my own.

Well the next stop was to the Tractor Supple Warehouse were we need some things for our animals and some bolts. While we were walking around the store looking I spotted a bushing in the tractor section that looked like it would work perfect for the metal part of the mallet, it was about the right size and weight and only $2.49, so I put in the cart. That night after about five minutes worth of whittling to get the handle to fit inside the bushing I then cut a slot for a wedge and I epoxied it all together. The next day I cleaned off any squeeze out I had and cut the end flush with the top. Now I have a great little mallet that I have been using and the best part is it only cost me $3.00 and I made it myself, now I know I got lucky finding that handle, but a dowel rod would work just as well, or if your a turner or know a turner then you could make on in no time. They had some other sizes bushing at the store if you wanted a heavier mallet. Even though they are not brass and they are harden steel they will work fine as long as your not hitting steel against steel, and since all my chisels are wood handled or plastic I think I am ok. If anyone has any question feel free to E-mail me and I'll do my best to answer them


Joey